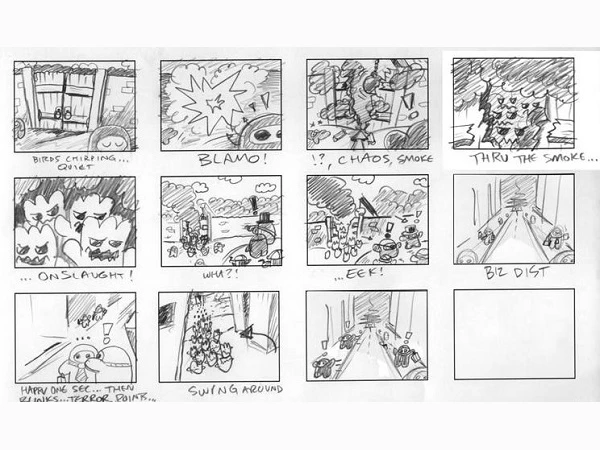
A comic script tells the artist what to draw in each panel, and tells the letterer which words go where. The reader never sees it. Its one job is to get the comic in your head onto the page.
This guide takes you from a first idea to a script an artist can draw. One short story runs through every step, and there is a template to copy at the end.
The short version
- Pick a method: full script, or plot first.
- Plan the story. Write it in two lines, then say what happens on each page.
- Split each page into panels. One panel shows one moment.
- Describe each panel: the shot, the place, who is there and what they do.
- Write the words: dialogue, captions and sound effects. Keep them short.
- Format the page so the artist and the letterer find what they need.
- Check it, once as the artist and once as the reader.
Who reads a comic script
The artist, the letterer and the editor, if you have one. Often it is also you, six months later, trying to remember what you meant.
Dark Horse Comics sums up the job in its script format guide: “if it isn’t in the script, don’t expect to see it in the art.” The artist can’t read your mind. If the cat must be grey, write that it’s grey. If the clock must say 11:40, write it.
Since readers never see the script, it doesn’t need fine prose. Plain words work best. Save your best writing for the parts the reader will see: the dialogue and the captions.
Step 1: Choose full script or plot first
There are two main ways to write for an artist.
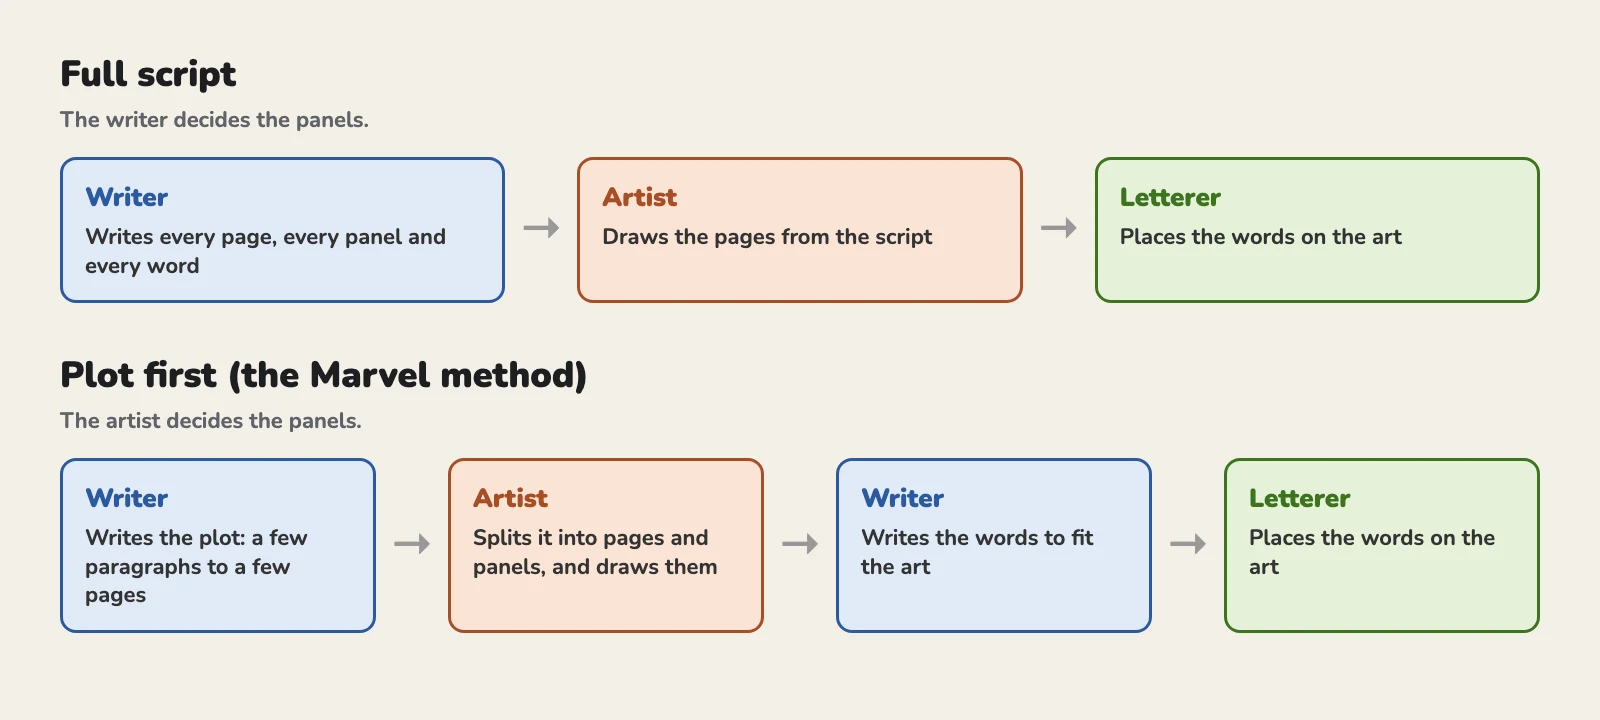
Full script. You write every page, every panel and every line before the artist starts. You decide how many panels a page has and what each one shows. Use it if you are new, if you work with an artist you don’t know well, or if you plan to make the art yourself.
Plot first, also called the Marvel method. You write the plot, which can run from a few paragraphs to a few pages. The artist splits it into pages and panels and draws them. Then you write the dialogue to fit the art. Stan Lee worked this way at Marvel in the 1960s with artists such as Jack Kirby and Steve Ditko, and it let him write many titles at once (Wikipedia). People still argue about how much of the plotting came from the artists.
Plot first gives the artist more room. It also hands them the pacing: how many panels each moment gets, and where each page ends.
The rest of this guide uses full script.
Step 2: Plan the story before the panels
Don’t start with Panel 1. Start with the whole story in two or three lines:
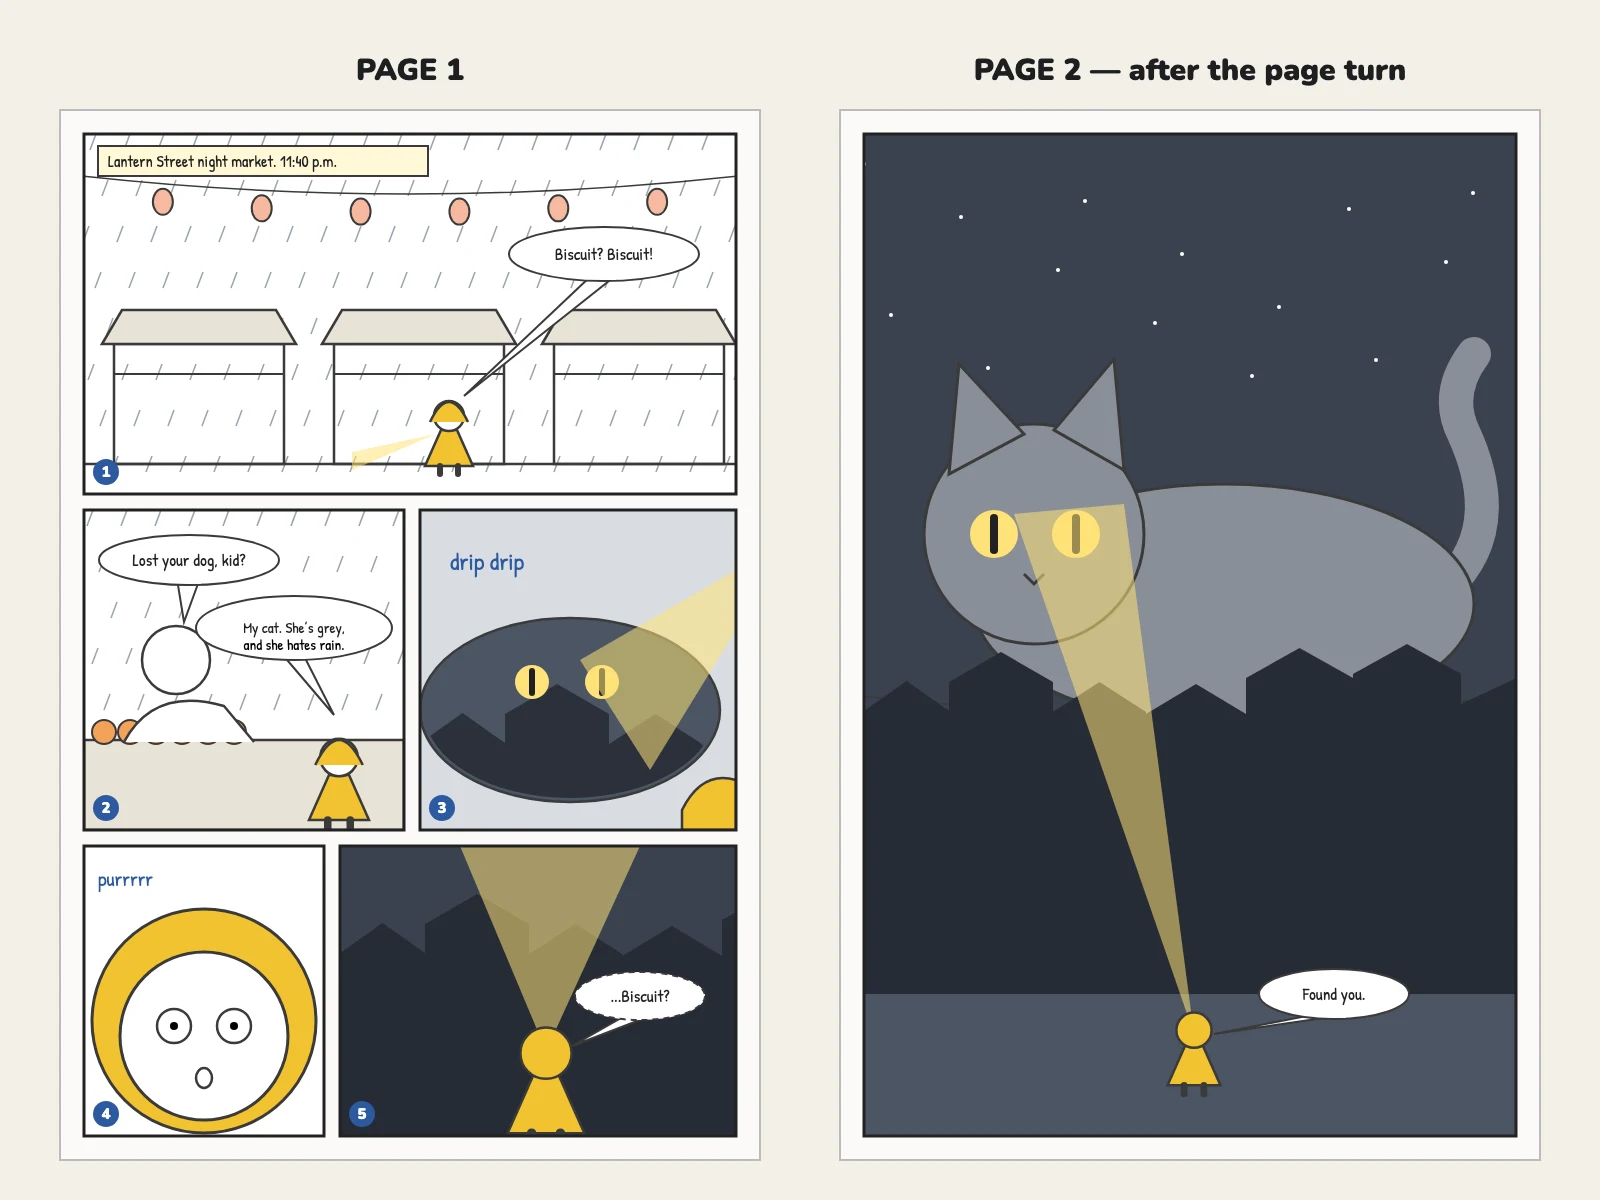
Nora, 10, searches a night market in the rain for her lost cat, Biscuit. She finds her on the roofs. Biscuit is now the size of a bus.
If this is your first comic, keep it short: one to eight pages. You learn more from finishing a short story than from starting a long one.
Next, write a page plan: one line per page, saying what happens on it.
- Page 1: Nora searches the market. A fruit seller can’t help. Something big watches from the roofs.
- Page 2: The reveal. Biscuit, now huge, lies curled across three roofs.
- Page 3: Nora climbs up. Biscuit sniffs her and knows her.
- Page 4: Nora rides home across the city on Biscuit’s back. Last panel: her mother opens the front door.
A page plan shows problems early: a page with too much on it, or a page where nothing happens.
Plan around the page turn
In a printed Western comic, page 1 is on the right. After that, pages come in pairs: 2 and 3 face each other, then 4 and 5. The reader sees both pages of a pair at once, so they may spot a surprise on page 3 while still reading page 2. A surprise on an even page, the left one, is the first thing the reader sees after a turn.
That’s why Biscuit shows up on page 2. Page 1 ends on a question, and the answer waits behind the turn.
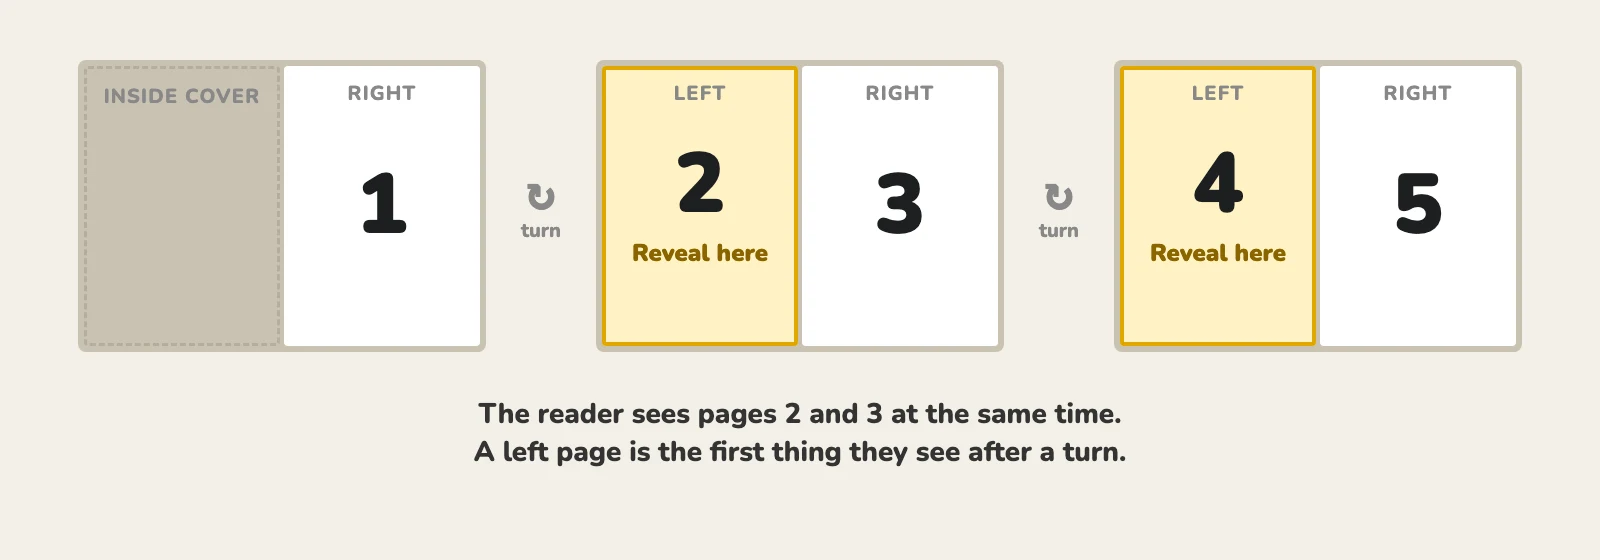
Manga reads right to left, so the sides swap. Webtoons scroll, so there are no page turns at all. There, empty space between two panels makes the reader wait before a reveal.
Step 3: Split each page into panels
A panel shows one moment. It sounds obvious, and it’s the easiest rule to break. “Nora opens the door and runs down the stairs” is two panels, maybe three. Given one panel, the artist has to pick one moment, and it may not be the one you wanted.
How many panels on a page? There is no fixed number. Dark Horse’s guide suggests three or four for action and more for quiet scenes, with a warning: the more panels, the smaller each one gets. Alan Moore and Dave Gibbons built Watchmen on a grid of nine panels a page. A big fight might need just two.
Give each panel the size it needs. Our page 1 opens with a wide panel because it has to show where we are. Panel 4 is small because it is a quick look at a face. And every page should end with a reason to turn.
Step 4: Write the panel descriptions
A panel description tells the artist what to draw. Dark Horse says a sentence or two is usually enough. Cover these points:
- Shot: how close we are (wide shot, medium shot, close-up) and, if it matters, the angle: from above or from below.
- Place and time: in the first panel of a scene, or when they change.
- Who: who is in the panel and where they stand. List speakers left to right, in the order they talk, so the balloons read in the right order.
- Action: what each person is doing in this one moment.
- What matters: the one detail the reader must notice.
The first time a character appears, write the name in caps and add a few details: age, look, and one thing that sets them apart. NORA (10, yellow raincoat, boots too big for her).
Don’t describe what can’t be drawn. “Nora misses her dad, who left last year” is not a picture. Show it, with a photo in her hand, or put it in a caption.
Here is panel 3 of our page, written three ways:
- Too thin: Panel 3. Nora looks around.
- Too much: Panel 3. Nora, more and more worried, looks around the market and remembers the day Biscuit came home as a kitten, while the rain gets heavier and the stalls start to close.
- Right: Panel 3. Low angle on a puddle, lit by Nora’s flashlight. Only her boots are in shot. In the puddle we see the roofs, and two huge round eyes glowing up there. Nora has not seen them.
The third one gives the artist a shot, a light and the one thing that matters: the eyes. The rest is up to them. A good artist knows how to draw a market.
Step 5: Write the words
A script has three kinds of words:
- Dialogue: what characters say. It goes in balloons.
- Captions (CAP): a narrator, a place and time, or a voice from another scene. They go in boxes.
- Sound effects (SFX): noises that become part of the art.
Keep them short. Dark Horse’s guide sets a limit of about 25 words per balloon and 50 words per panel at most. Every word covers part of the art, so stay well under that when you can.
The same guide says the most back-and-forth that usually fits in one panel is a comment, a reply and an answer to the reply. If two characters trade more lines, add a panel.
A few more tips:
- Don’t make the words repeat the picture. If the panel shows Nora soaked, she doesn’t need to say “I’m wet.”
- Read every line out loud. If a line is hard to say, it will be hard to read.
- Save the last line of a page for the hook.
Notes for the letterer go in brackets after the name. These come from the Dark Horse guide:
- (OP): off panel. The speaker is not in the shot.
- (thought): a thought balloon.
- (whisper), (small), (burst), (weak): how the balloon or the letters should look.
- Two dashes (—) at the end of one balloon and the start of the next, when a sentence runs across both.
- Underline the words you want stressed.
Step 6: Format the script
There is no single standard. Each publisher, and many writers, have their own. The Dark Horse format is clear and easy to copy, so we use it here:
- Put the title, issue, your name and the script page number at the top of each page.
- Start each comic page on a new script page, with its number and panel count: PAGE ONE (five panels).
- Number the panels: Panel 1, Panel 2.
- Write the speaker’s name in caps on its own line, then the words on the next.
- List the words in the order the reader will read them.
- Use plain text, with no tables, tabs or fancy fonts. The letterer copies your dialogue straight into the art.
Here are the first two pages of Nora’s story:
Lost and Found #1 • Writer's Name                                  1

PAGE ONE (five panels)

Panel 1. Wide shot. A night market in the rain. Paper lanterns hang
over the stalls. In the middle, NORA (10, yellow raincoat, boots too
big for her) shines a flashlight under a fruit stall.

CAP:
Lantern Street night market. 11:40 p.m.

NORA:
Biscuit? Biscuit!

Panel 2. At the fruit stall. On the left, the FRUIT SELLER (60s, bald,
apron) leans over the counter. Nora looks up at him.

FRUIT SELLER:
Lost your dog, kid?

NORA:
My cat. She's grey, and she hates rain.

Panel 3. Low angle on a puddle, lit by Nora's flashlight. Only her
boots are in shot. In the puddle we see the roofs, and two huge round
eyes glowing up there. Nora has not seen them.

SFX:
drip drip

Panel 4. Close on Nora's face. She heard something. Eyes wide.

SFX (small):
purrrrr

Panel 5. From behind Nora. She turns and points her flashlight up at
the dark roofs.

NORA (whisper):
...Biscuit?

PAGE TWO (one panel)

Panel 1. Splash page: one panel fills the page. The market roofs, seen
from the street. A grey cat the size of a bus lies curled across three
roofs. Her eyes glow. Far below stands Nora, small in her yellow coat,
her flashlight on the cat's face.

NORA:
Found you.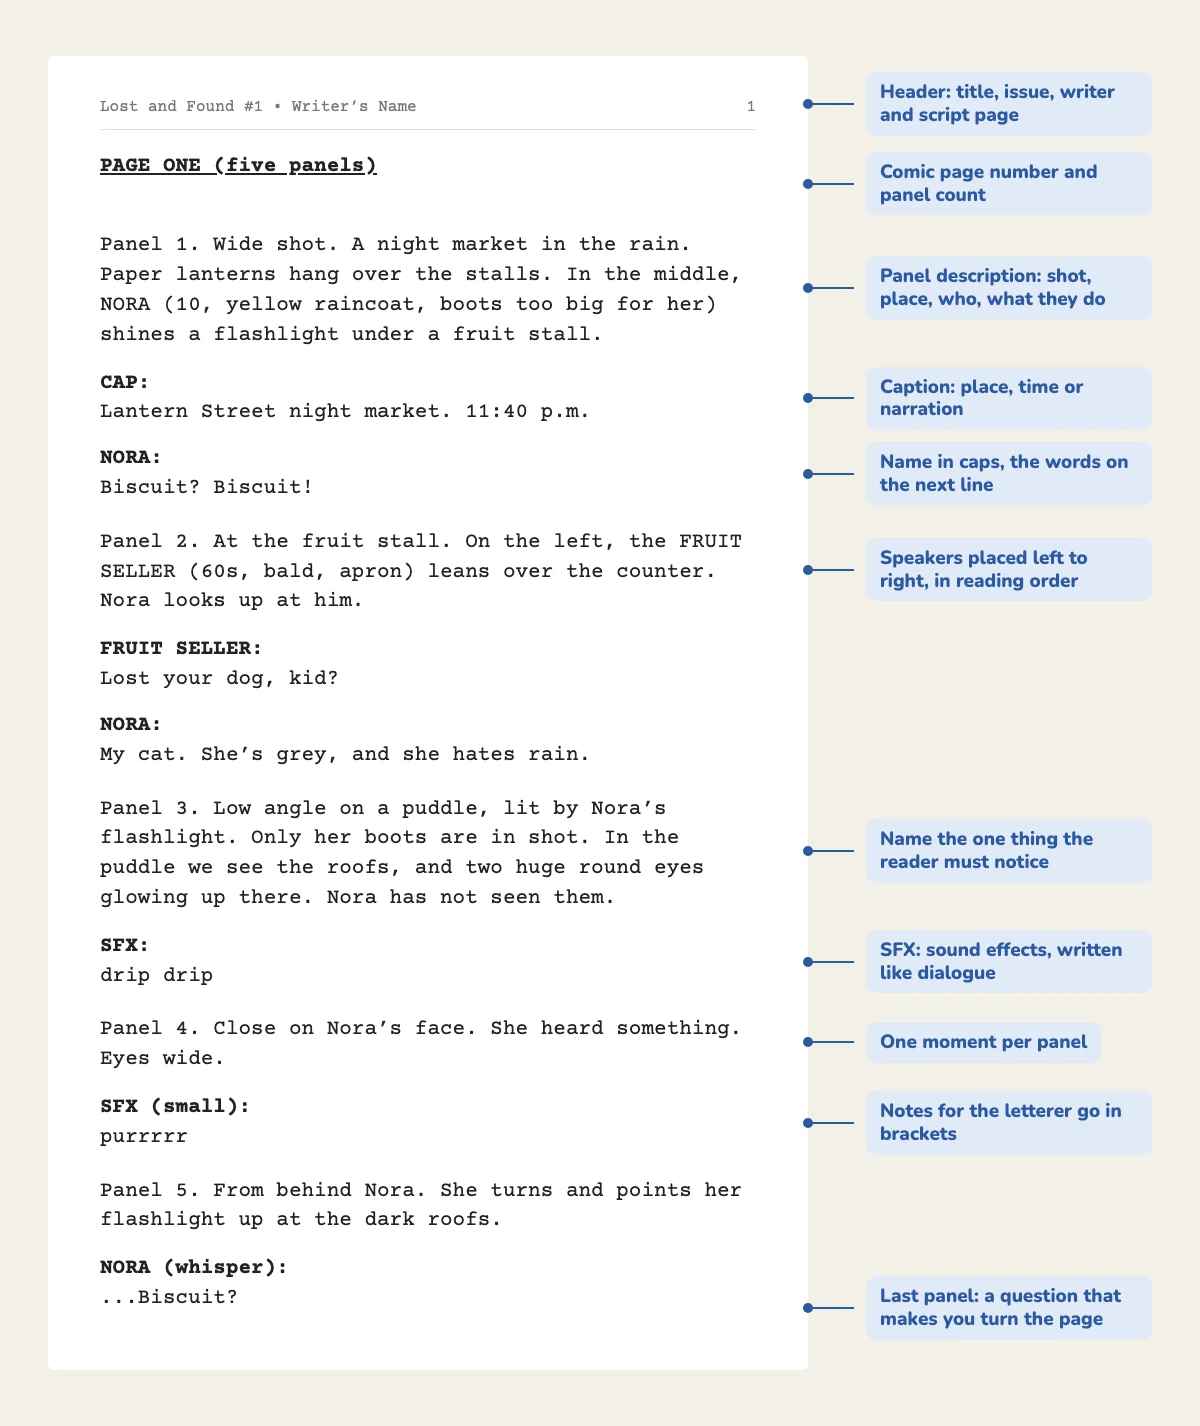
See the page before the artist does
Before you send the script, sketch each page as small, rough boxes. Writers call these thumbnails, and stick figures are fine. The artist usually decides the final layout, but thumbnails tell you quickly whether each panel works as one picture and whether the words fit.
Step 7: Check the script
Before you send it, go through this list:
- Each panel shows one moment that the artist can draw as one picture.
- Each description gives the shot, the people and the one thing that matters.
- You describe every character the first time they appear.
- No balloon goes over 25 words, and no panel over 50.
- No line repeats what the picture shows.
- Each page ends on a reason to turn, and big reveals land on even pages.
- You have read all the dialogue out loud.
Then read it one last time as the artist. Could you draw every panel without calling the writer?
Free comic script template
Copy this into Google Docs, Word or any text editor. You don’t need special software.
[TITLE] #[ISSUE] • [YOUR NAME]                            [SCRIPT PAGE]

PAGE ONE ([NUMBER] panels)

Panel 1. [Shot]. [Place and time]. [Who is in the panel, left to
right, and what each one does]. [The one thing the reader must notice.]

CAP:
[Narration, or place and time.]

CHARACTER NAME:
[Dialogue. 25 words or fewer.]

OTHER CHARACTER (OP):
[Dialogue from someone off panel.]

Panel 2. [Shot]. [Who and what they do]. [What matters.]

SFX:
[Sound effect]

PAGE TWO ([NUMBER] panels)

Panel 1. [...]
Read real scripts
The fastest way to learn the format is to read scripts by working writers, next to the comics they became. The Comic Book Script Archive, run by Comics Experience, has more than 100 free scripts by writers such as Alan Moore, Neil Gaiman and Brian Michael Bendis. Pick one, then read the printed comic. You’ll see what the artist kept, changed and added.
Two books help:
- Making Comics by Scott McCloud (2006), on panels, pacing and how a reader moves through a page.
- Words for Pictures by Brian Michael Bendis (2014), on writing comics and working with artists.
Writing for manga, webtoons and comic strips
The method stays the same. The page changes.
- Manga reads right to left, so left and right swap: reveals go on the right-hand page. Many manga artists skip the typed script and draw a “name” instead: a rough version of each page with its panels and dialogue. Try it with the AI manga maker.
- Webtoons scroll down, one panel wide, with no pages. Write panel by panel, and note the space between panels: a long gap makes the reader wait. See the webtoon maker.
- Comic strips have three or four panels, and the last one carries the joke. Write that panel first, then the ones that lead to it. See the comic strip maker.
From script to pages without an artist
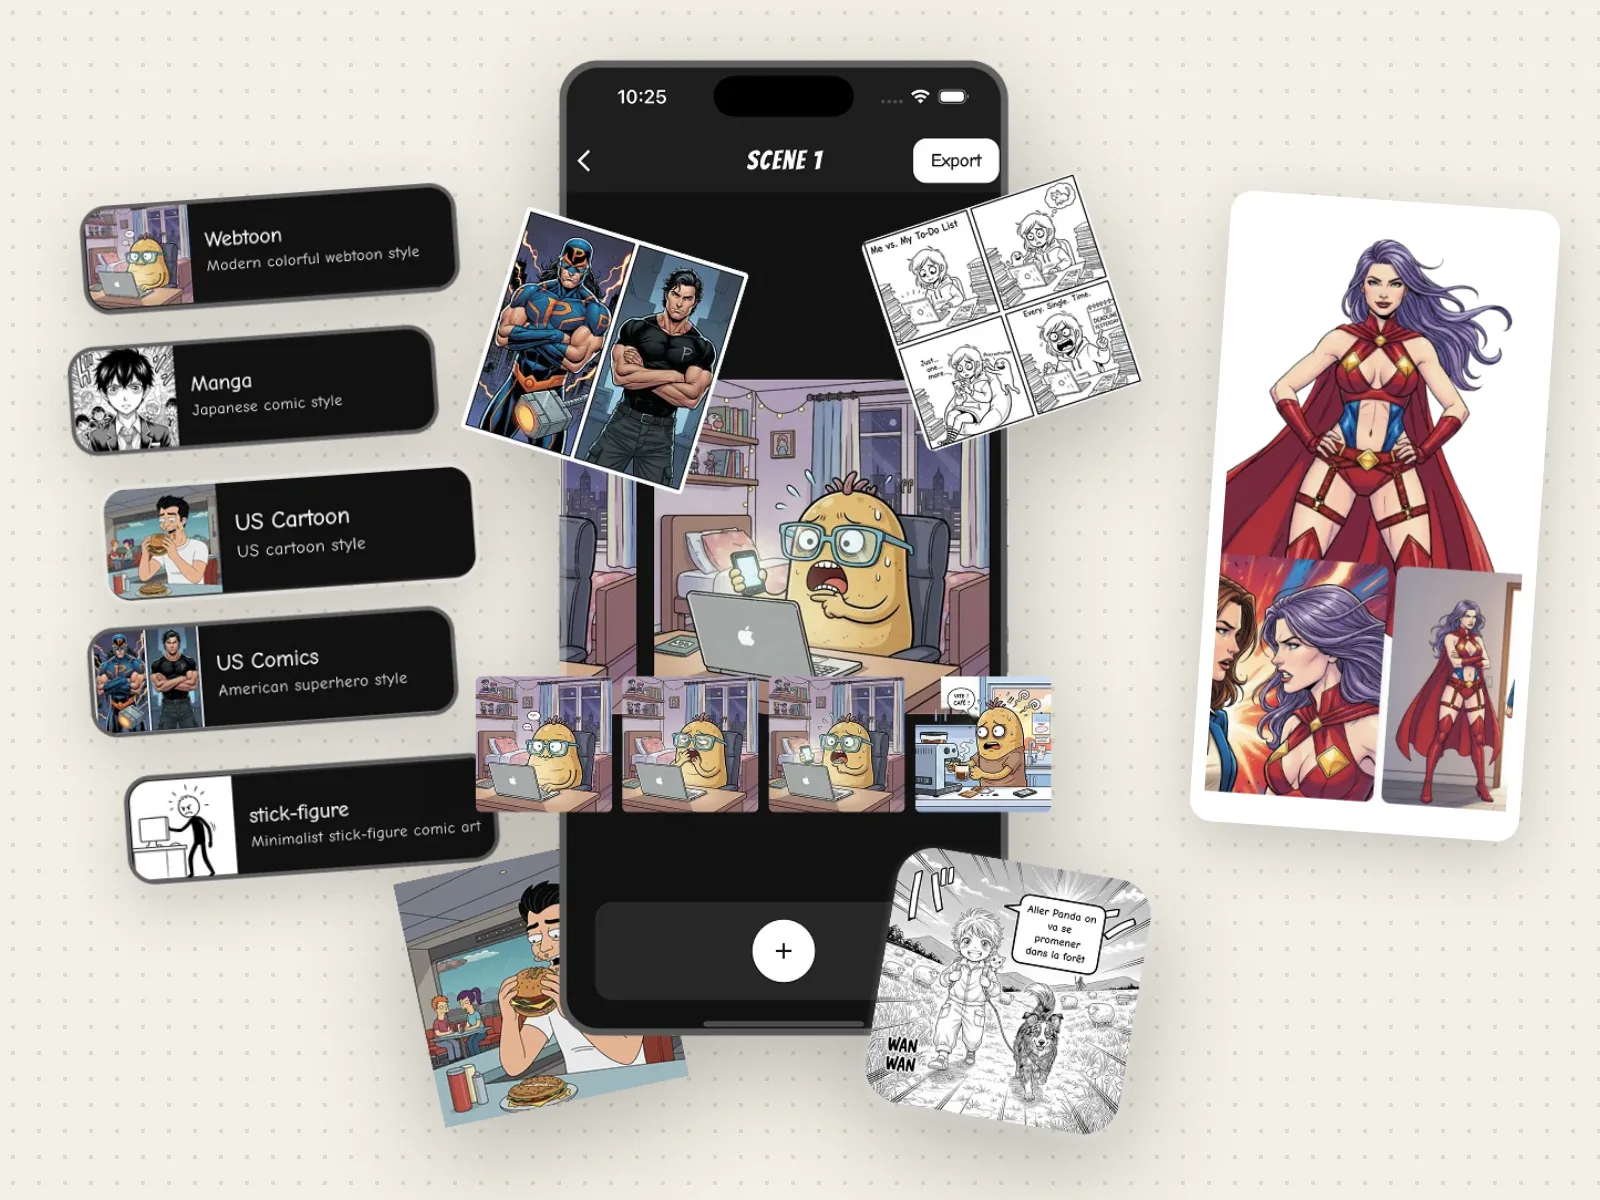
Plenty of comic writers don’t draw. If you have no artist, Emaki turns your script into comic pages on your iPhone:
- Create your cast once with the AI character creator. The app keeps each face, hairstyle and outfit the same from panel to panel.
- Pick a page layout, then type in each panel description from your script. The habits from step 4 (the shot, the people, the one detail) also make good prompts.
- Add your dialogue with the speech bubble maker: speech, thought or narration, in the order you wrote it.
Our guide on how to make a comic on iPhone walks through the whole process, from the script to the page you post. Writing a hero story? Start from the superhero comic maker.
FAQ
What is the format of a comic script?
Each comic page starts on a new script page, with its number and panel count. Under it, each panel has a number and a short description of what to draw. Then come the words: names in caps followed by their dialogue, captions (CAP) and sound effects (SFX). There is no single standard, but the Dark Horse format is a good one to follow.
How many words should a comic panel have?
Dark Horse’s guide sets a limit of about 25 words per balloon and 50 per panel. Fewer is better, because every word covers part of the art.
How many panels should a comic page have?
There is no fixed number. Dark Horse suggests three or four panels for action and more for quiet scenes. The more panels you add, the smaller each one gets.
Should I write a full script or use the Marvel method?
Write a full script if you are new, if you work alone or if you don’t know your artist well. Plot first works when you trust the artist with the pacing and want their ideas in the layout.
Can I write a comic if I can’t draw?
Yes. In many comics, one person writes and another draws. You can also turn your script into pages yourself with an app like Emaki.
What software do I need to write a comic script?
None. Any text editor works, and plain text is what the letterer wants anyway.